
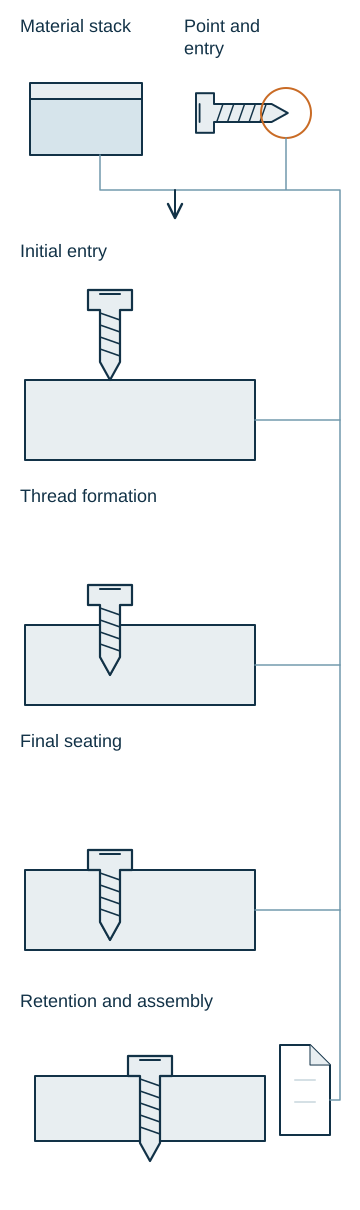
Start with the actual panel layers and pilot-hole condition. Record whether the screw stalls during entry, thread creation or seating, then check retention as well as ease of installation.
Locate the difficult stage of installation
Swipe the table sideways to compare every column. Keyboard: use the left and right arrow keys.
| Stage | First checks |
|---|---|
| Before entry | Check the actual substrate, point, pilot-hole requirement and tool alignment. |
| During thread creation | Check whether the thread and pilot hole suit the actual material; compare axial feed and speed under controlled conditions. |
| At final seating | Separate seating resistance from the earlier thread-forming stage. A high final torque does not identify where the resistance began. |
Do not simply increase force or enlarge the pilot hole: installation effort and thread retention must be assessed together. There is no universal pilot-hole size for all plastics and screw designs.
Keep tool alignment, axial feed and rotational speed consistent when comparing designs. Excessive speed in plastic thread forming can generate frictional heat that impairs the process. Select the setting for the actual polymer and screw size; there is no universal speed.
Describe the entire material stack
Swipe the table sideways to compare every column. Keyboard: use the left and right arrow keys.
| Review item | What to check and how to interpret it |
|---|---|
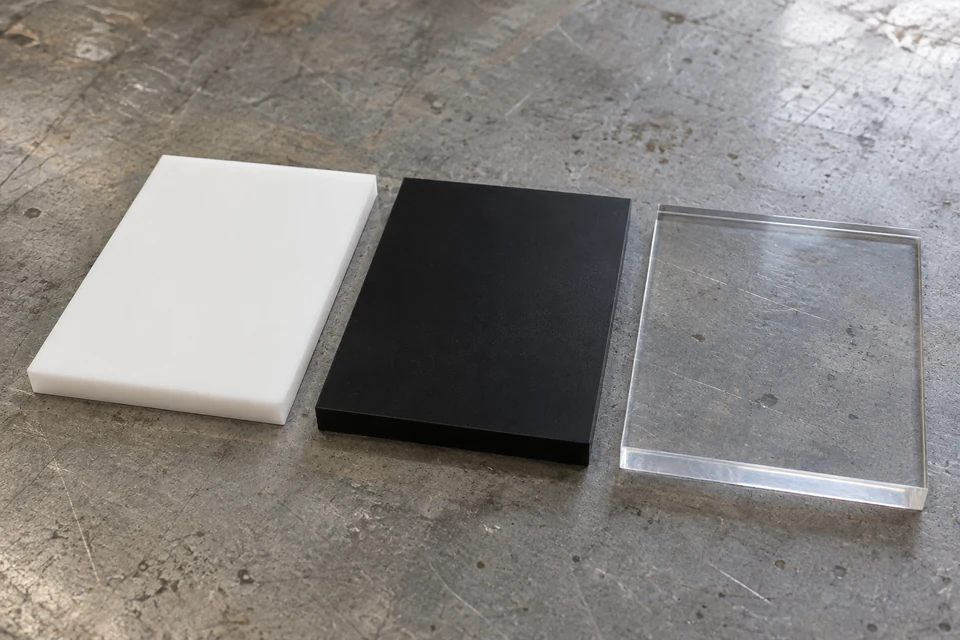
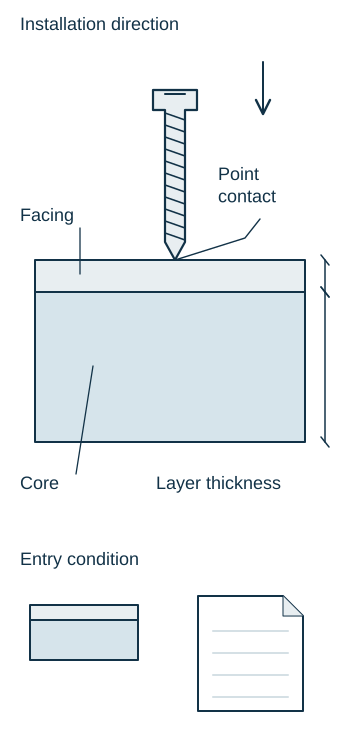
| Material stack | The material designation, thickness, surface layer and installation direction define the stack that the screw must penetrate. |
| Facing and core | A laminated panel can present a tough outer layer over a more compliant core, so successful penetration and useful thread engagement may occur in different regions. |
| Pilot-hole condition | An existing pilot hole adds further variables: its preparation method and any entrance damage can affect the trial. |
| Representative trial material | A test on an uncoated core alone may therefore miss the difficulty encountered on the actual production panel. |
Distinguish a locating point from a cutting feature
Swipe the table sideways to compare every column. Keyboard: use the left and right arrow keys.
| Review item | What to check and how to interpret it |
|---|---|
| Material-specific function | The material stack determines which functions the screw end needs to perform. |
| Locating point | A point helps locate the screw and initiate entry. |
| Cutting and forming | A cutting edge can remove material, while a thread-forming design displaces it under appropriate conditions. |
| Driving load and retained material | Those actions have different consequences for driving load and retained material. |
| Limits of a sharper or cut point | Making a point sharper or adding a cut does not automatically improve the whole connection. |
| Complete end function | The end must still resist the installation load, guide the screw and leave adequate material for the intended thread engagement. |
What changes when the screw is stainless steel?
Point geometry is only part of this assessment; the finished material condition also matters. The word stainless describes a material family, not a cutting capability. An austenitic 304 or 316 screw and a heat-treated martensitic 410 screw can have different finished hardness and deformation behavior. For example, 316 gains strength through cold working rather than conventional quench hardening, whereas 410 can be hardened by heat treatment. These distinctions matter when the point is asked to penetrate a tough facing, but they do not determine whether the thread geometry suits the polymer. A useful supplier assessment therefore needs the actual screw condition and application evidence as well as the alloy name.
Corrosion selection and entry performance answer different design questions. A damp outdoor composite panel may justify evaluating a stainless grade and clean surface suited to that exposure, while still needing a purpose-designed thread or prepared hole. Choosing 410 only because a sample enters more easily may change the corrosion basis of the original design. Choosing 316 only for corrosion resistance does not establish that its point can cut through the facing.
Choose guidance for the actual material
Applicable guidance depends on the identified substrate and screw condition. Specialized systems illustrate why this matters. Direct-assembly screw systems can be designed separately for thermoplastics and thermosets. Data for a specialized system do not prove that an ordinary cut-point screw offers the same behavior. The relevant application data are those for the selected screw family and substrate, including their pilot-hole assumptions. A recommendation for plastics cannot automatically represent sheet metal or wood composites.
For an actual composite decking board, the deck-screw application information can help frame the board-and-support requirement. It does not establish suitability for an arbitrary thermoplastic boss, thermoset or composite panel; those applications need their own screw and substrate assessment.
Apply the diagnosis to a faced composite panel
A hypothetical panel with a hard facing over a softer core shows how these checks work together. The current stainless screw stalls before its first full thread enters. An investigation could compare the existing setup with controlled pilot-hole preparation while keeping the screw, panel lot and driver unchanged. Photographs of the facing and a sectioned trial coupon could show whether material was cut, crushed or separated. A second, application-specific screw design could then be compared under the same conditions. This sequence distinguishes an entry problem from a thread-design problem without hiding either behind increased tool force.
Successful seating means that the head clamps the required layers rather than merely bottoming against an obstruction. Where moisture or temperature changes the panel behavior, the approval plan also needs representative service conditioning. A screw that installs successfully into a dry bench sample may not represent the same panel after storage or service exposure. Documented conditioning keeps the comparison from mixing results obtained in unknown material states.
Approve the connection and record the purchasing requirements
Swipe the table sideways to compare every column. Keyboard: use the left and right arrow keys.
| Review item | What to check and how to interpret it |
|---|---|
| Complete acceptance | The trial is complete only when easy entry is matched by acceptable retention. |
| Required observations and performance | A representative-panel comparison needs to cover installation behavior, surface cracking, internal splitting or delamination, and the required pull-out or stripping performance. |
| Repeated assembly | Repeated assembly belongs in the trial where the application requires it. |
| Pilot-hole tradeoff | Enlarging a pilot hole may reduce resistance but weaken retention, so both outcomes matter to approval. |
| Traceable approved combination | Traceability between results, material lot, hole process and tool program gives later production-change reviews a validated combination to compare against. |
Swipe the table sideways to compare every column. Keyboard: use the left and right arrow keys.
| Review item | What to check and how to interpret it |
|---|---|
| Resin or board identity | A useful purchasing description identifies the resin or board rather than only calling it hard plastic. |
| Facing, hole and head position | It also includes the facing specification, pilot-hole preparation and acceptable head position. |
| Planned removals | If the assembly will be repaired, a stated number of planned removals gives the trial a defined use condition to reproduce. |
| Reassembly limit | It avoids an unsupported assumption that the connection can be reassembled indefinitely. |
Include these application details when you request a screw quotation. No catalog model is established here as a universal polymer screw; the proposed design needs review against the actual material and required retention.
Common questions
Does self-tapping mean that no pilot hole is needed?
No. Self-tapping describes creation of the mating thread, not a universal ability to drill through every substrate. Some systems require a prepared hole; others provide a specific penetration feature. Whether a pilot hole can be omitted depends on the selected screw’s intended method and the actual material stack.
Can lubricant make an unsuitable stainless screw work in plastic?
It may change insertion friction, but it cannot correct an unsuitable thread, insufficient engagement or a cracked boss. Any proposed lubricant also needs compatibility review for the polymer, finish and service. Its evaluation needs to cover both installation behavior and retained joint performance.